Thursday

A-Z Garden Tips: Zigzagging


How does your garden grow? Well, maybe Mary-Mary of the old nursery rhyme planted her flowers all in a neat little row, but I surely don’t. Personally, I find it a lot more interesting and visually appealing to mix things up a bit.

When I pick out my annuals in the spring, I like to grab a variety of bright colors. I might buy cosmos, dahlias, dianthus, geraniums, gerbera daisies, marigolds, violas, and zinnias. And I may even plant them in the same bed.

Usually, I cluster similar flowers in odd little bunches. Long ago, a veteran gardener and floral arranger told me the best flower groupings are done in odd numbers. I’m not even sure why, but the habit was formed.

Instead of lining my plantings all up in rows, I zigzag them. I guess I must have something against too much order in my garden. I guess I prefer splashes of color to stripes – at least for planting. And I think the flowers fill in nicely and look fuller and prettier this way.

Maybe it’s just me and my quirky garden. But I like it.
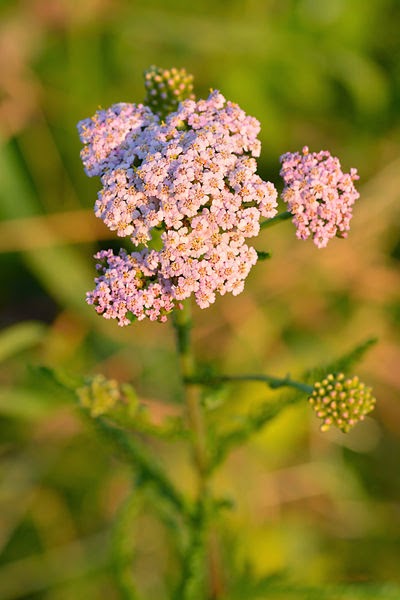
Marigolds
Public domain photo


NOTE:  This blogger has no affiliation with any product/s mentioned in this post and received no remuneration from the manufacturer/s or product promoter/s for this post.


Feel free to follow on Google Plus and Twitter. Like this blog?  Check out Practically at Home on Facebook.


Wednesday

A-Z Garden Tips: Yearly Yarrow


Yikes. My yearly yarrow seems to have vanished. This dainty perennial flower, which propagates easily in the garden, has gone missing. I have no idea why.

Maybe my pretty purple yarrow simply gave up after a couple of harsh Wisconsin winters.


So I am off to the nursery to hunt for this perennial pick to fill in an empty spot in my backyard garden. Hey, my feathery yarrow flowers beckoned butterflies. Who can argue with that?

Yarrow - Achillea Millefolium
by Ivar Leidus
 Creative Commons Licensing


NOTE:  This blogger has no affiliation with any product/s mentioned in this post and received no remuneration from the manufacturer/s or product promoter/s for this post.


Feel free to follow on Google Plus and Twitter. Like this blog?  Check out Practically at Home on Facebook.


Tuesday

A-Z Garden Tips: eXcavating for eXtra Planting Space


Mother’s Day is just around the bend, which means flower planting time is coming to the region. Like most gardeners in these parts, I can hardly wait. So I am preparing the terrain, so to speak.

Now that winter appears to have whirled away for good (although one never knows in the Upper Midwest), I am excavating areas of my garden that seem to have weathered the colder months less successfully. I’m digging out perennials and groundcover plants that aren’t coming back.

At the same time, I am pulling out emerging garden weeds – before they have a chance to become established this season.

My tool pick for this job is actually a lightweight, but sturdy, long-handled garden spade that is marketed for kids. (I like the Ames True Temper Real Tools For Kids Round Point Shovel With 36-Inch Handle, as seen here.) I love how easy this shovel is to wield, and the blade is just the right size for digging out and around single plantings and nasty weeds without damaging desirable neighboring plants.


I’m also cleaning out my patio pots and flower boxes.

This year, I am tossing all of the rooted dirt inside these planters, as I should have done more thoroughly last year. I’m scrubbing and rinsing the insides. (I prefer the OXO Good Grips Safe for Ceramic Palm Brush for this purpose, as it does not damage my terra cotta or ceramic garden pots. I keep one, as shown in the photo, with my gardening tools and supplies, so I don't mix it up with the one in the kitchen.)

When Mother’s Day arrives, and the hordes of horticultural hobbyists march into the local garden center, I will be ready to plant.

Images:
Product promo photos
Fair use

NOTE:  This blogger has no affiliation with any product/s mentioned in this post and received no remuneration from the manufacturer/s or product promoter/s for this post.

Feel free to follow on Google Plus and Twitter. Like this blog?  Check out Practically at Home on Facebook.


Monday

A-Z Garden Tips: Washing Wizardry


Even with garden gloves, any green thumber’s hands can get muddy and dirty. This is especially true during seed planting, deadheading, and other garden tasks requiring bare fingers.

Personally, I like to rinse off my hands pretty often, while I am gardening. But I don’t like kicking my shoes on and off to tromp into the hands for this purpose.

And I find it somewhat cumbersome to detach and reattach my water sprinklers or garden hose nozzles, just to rinse my hands.

So I have a much more convenient solution for hand washing. I simply recycle an empty laundry detergent bottle with a nozzle. I rinse it out completely and fill it with clean water. Then I keep it on the counter in my potting shed. When I need to rinse off my hands, I stick an empty bucket underneath (to catch any drips and runoff) and have at it.

An old dishtowel is handy for dry-offs.

Then I’m right back to the garden – that quickly.

Images:
LAN photo for PAH
All rights reserved

NOTE:  This blogger has no affiliation with any product/s mentioned in this post and received no remuneration from the manufacturer/s or product promoter/s for this post.

Feel free to follow on Google Plus and Twitter. Like this blog?  Check out Practically at Home on Facebook.


Saturday

A-Z Garden Tips: Vespiary Vigilance


A vespiary near the garden can lead to violence. That sounds pretty vile, but what does it mean?

What is a vespiary? It’s a wasp next. And, if disturbed, the vespirary can virtually erupt, with wasps swarming and buzzing and stining.

Wasp stings can cause pain, itching, rashes, and swelling. In allergic individuals, the reactions may be even more severe. For this reason, vigilant gardeners are cautious around wasp nests and particularly careful when removing them.

So how do you get rid of a wasp nest?


  1. First, it’s important to find out if you are allergic to wasp stings. A medical allergy test can be done.

  1. It may be helpful to determine what kind of wasps are living in the nest. Odds are, they are hornets, paper wasps, or yellow jackets. None of these are bees, as wasps are another species altogether.

  1. Choose your timing strategically. The best time to remove a wasp nest is in midwinter, when freezing temperatures kill off the inhabitants. The next best choice is early spring, before the colony is fully populated. By late summer, a large nest might contain thousands of wasps. Also, the wasps tend to be most aggressive later in the season.

  1. Ideally, the wasp nest removal takes place at night, when wasps generally are resting. Avoid using a flashlight, as this will draw them to you.

  1. If the wasp nest is up high (as it is likely to be), it’s far safer to call a professional exterminator than to try to tackle the job yourself. If the wasps swarm, you could risk falling from a ladder and suffering serious injury. Professional help is also advised, if the wasp nest is in a hard to reach spot, such as under house siding or beneath a deck or porch.

  1. Put on protective clothing, covering as much of your body, legs, feet, arms, hands, neck, head, and face as possible. Safety goggles can be useful. Wear a mask to cover your mouth and nose, particularly when spraying the wasp nest.

  1. Pick and clear a way of quick escape before spraying, as the wasps are sure to evacuate the nest promptly. Remove flower pots, garden tools, toys, or other potential roadblocks.

  1. Spray the entire wasp nest liberally. Both organic and chemical wasp sprays and powders are sold. Keep in mind that these pesticide products are poisonous.

  1. Be sure to collect and dispose of any dead wasps after spraying, so pets and other animals do not eat them and ingest the wasp spray.

  1. Keep children, pets, and others away from the area for at least 24 hours.


Safe removal of the wasp nest and eviction of its wasp population can greatly increase gardening safety and enjoyment. Also, by losing the wasps, but not harming any bees, the natural garden pollination can continue unheeded.

Images:
Wasp Nest
By Sanjay Acharya
Creative Commons Licensing


NOTE:  This blogger has no affiliation with any product/s mentioned in this post and received no remuneration from the manufacturer/s or product promoter/s for this post.


Feel free to follow on Google Plus and Twitter. Like this blog?  Check out Practically at Home on Facebook.