

It’s sew simple!
How often can you find a pair of off-the-rack pants that fit
your body perfectly? If the waist fits, then the inseam may be too long or
short. Everyone seems to have this problem: children, teens, men, women,
seniors and more.
What’s a fashion or
family shopper to do?
Certainly, many stores offer tailoring services. You can pay
up to $20, just for hemming a new pair of pants to your ideal length. For
family apparel or even school uniforms, this can add up quickly. Hemming a pair
of pants is not that technical or difficult, so why not save the money, and do
it yourself?

It’s sew simple to
tailor-hem a pair of trousers!
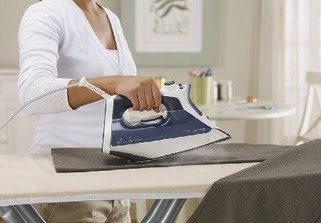
First, plug in your steam
iron. Look inside your trousers
for a fabric care label. This will indicate the appropriate heat setting for
your iron.
While your iron heats up, you can gather your sewing notions. You will need a needle, a wooden ruler, a pair of scissors, and several straight pins. Choose sewing thread to match the background color of your garment, as
closely as possible.
You can hem your pants with or without a sewing
machine (see
below).
Try on your new
trousers.
Even if you tried on your new pants in the fitting room at
the store, you will need to put them on again at home. Put on the shoes you
plan to wear with this pair of pants.
If you can, ask someone else to stick a straight pin into
one leg of your pants, right where you wish to fold them up into your new hem.
Usually, this is the spot where the pants meet the top of your shoes, but you
can adjust this to fit your current style.
Aim the pin horizontally, so it is positioned level to the
floor.
Turn your garment
inside out.
Pants are hemmed from the inside, so the stitching is
virtually invisible. (Cuffed trousers are often an exception, but this is a more
complicated endeavor.)
Turn your pants inside out before you begin working on
them.
Measure exactly for
perfect hemming.
You can do this on top of your ironing board.
To make pants
shorter, you will want to bring the original hem upwards.
To make pants longer,
you will need to use a seam ripper or a small pair of scissors (Manicure scissors work well.) to remove the
ready-made hem stitching. Press each pant leg to remove the first hemline creases.
Roll each pant leg to the length you wish. Measure carefully
with a ruler, so your hems will be even all the way around. Pin your pants
about an inch from the edge, as you go.
Press your new hemline into place, easing as needed. (Flared and bell-bottom pants may require a bit of easing to nudge hem allowances
into place. Done neatly, this will not show from the outside of each pant leg.)
may require a bit of easing to nudge hem allowances
into place. Done neatly, this will not show from the outside of each pant leg.)
Place pins horizontally along the inside fold/sewing line of
each pant leg to hold the pressed hem in place for stitching. Use plenty of
pins, at least one every inch or so.
Press both pant legs flat against each other to check that
they are exactly the same length.

Should you trim extra
hem fabric?
This is a matter of personal choice. If your new hem allowances
are more than 2” to 3” deep, you may choose to trim off a bit. Of course, if
you do, you will have to finish the new raw edges (see below).
If you are hemming a pair of pants for a growing child, you
may choose to leave the hem allowances intact. This will give you the option of
lengthening the trousers after the child experiences a growth spurt.
Finish off any rough
edges.
If you have merely simply tucked up the old finished hem on
your pants, then you can skip this step.
However, if you have trimmed off extra hem allowances, then
you will need to take care of the rough edges for neatness and fray prevention.
Simply tuck under a small portion (approximately 1/8” to 1/4”), all the way
around each of your pant legs. You will want to remove the pins for this step
and replace them after you have finishing ironing the now-neater edges.
Use the ruler to check your work for consistency.
Press both hem allowances (both pant legs) carefully before
proceeding.
Stitch your trouser
hems.
You can hem your pants by hand or on a sewing machine. Some
tailors employ a blind-stitch for this purpose. If your machine offers this
stitching option, your owner’s manual will provide specific instructions for
operating your machine’s controls and performing this stitch.
Narrow pant legs, such as one might find on stovepipe pants
or skinny jeans, are easiest to sew by hand. These can be difficult to
accomplish on a sewing machine, unless it has a very narrow base option.
Because flared and bell-bottom hems often require a bit of easing and
adjustment, these may also be easier to manage with hand-sewing.
Use a basic blanket stitch for hand-sewing your trouser
hems. Thread your sewing needle, and knot the thread securely. Start sewing
right at the inseam of one pant leg (the seam between the legs of the pants),
and sew all the way around to the same spot. Repeat the process with the other
leg.
Blue jeans and athletic wear may be topstitched, if you are
a very capable and steady sewer. You can select a straight stitch (or a narrow
zigzag for knits), to sew your hems.
Make sure you remove all pins and clip all excess threads
before giving your pants a final pressing for wearing.
Image:
Adapted from public domain
image
Feel free to follow on Google Plus and Twitter. Like this
blog? Check out Practically at Home on Facebook.

No comments:
Post a Comment